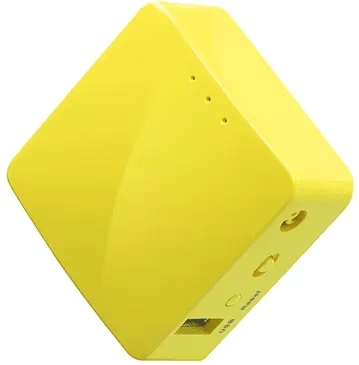
GL.iNet offers a vast variety of mini routers. Each router is worth spending every penny. In this post, we’ll be uncovering everything about the GL iNet GL MT300N V2 Setup. It is popularly known by the name “Mango” because this router comes in bright yellow. It is a mini router that offers speeds of up to 300Mbps. This one is a portable router and thus you can easily take it along on your every travel destination. With this one, you need not worry about the security of your network because OpenVPN encryption keeps you secure. It features dual Ethernet ports alongside 128MB RAM and 16MB Flash ROM. Additionally, you can connect to the Internet using four different methods. These are: Ethernet, repeater, USB modem, and lastly via Tethering.
Now, as you know about its specifications, let’s check out the setup steps.
GL iNet GL MT300N V2 Setup Steps
Before proceeding with the setup steps, the accurate placement of the router is non-negotiable. Every networking device requires proper space for its operations. So first, plot the MT300N V2 router in an open space, potentially where there are minimal hindrances. Here, hindrances mean thick concrete walls, heavy furniture set, and various metal and electronic items. Yes, you read that right, a few metal and electronic gadgets can hamper the outcome of your GL iNet GL MT300N V2 setup. Some of the common gadgets are: microwave, cordless phones, baby monitors, fish tanks, aluminum doors, refrigerator, CCTV cameras, including ovens. So after you hunt out the right spot for your mini router, you can proceed with the next steps.
Setup Process
✓ First up, take the USB power cable that came inside the GL iNet GL MT300N V2 Setup box. Now link it to your mini router’s power port. Thereafter, plug it into a wall socket. Switch on the power button. Let the router boot up completely before heading towards the next step.
✓ After the router boots up, fetch an Ethernet cable alongside your laptop, or you can use your computer system as well. Using the cable, link the device to the router. If you do not prefer unnecessary wiring, then you can also build the connection between your gadgets using wireless connections. These details are written on your Mango’s (MT300N V2) base panel.
✓ Next up, on the connected gadget, open the internet browser. To avoid unnecessary issues with the GL iNet GL MT300N V2 setup, make sure your chosen browser is compatible in addition to it it should be up-to-date as well. Need recommendations for the same? If yes, then we suggest choosing between Chrome, Firefox, Safari, Edge, and Internet Explorer.
✓ Move ahead to the chosen browser’s URL column. In this column, fill in http://192.168.8.1. Click Enter. Avoid any typing mistakes here.
✓ Finally, you have to select the language that you are comfortable with. Thereafter, tap on Next. Now you’ll be prompted to fill in the admin passkey. There is no preset key. So curate your own. Confirm it and tap on Apply. With this, you now have access to the GL iNet GL MT300N V2 setup page. You can now link to the internet. For doing so, check out the next section.
Connecting To The Internet
Now, as mentioned earlier, there are four ways through which you can connect your MT300N V2 to the internet.
✓ Ethernet: For connecting via this method, you require an Ethernet cable alongside an upstream device like your modem. So just slip in the cable coming from your modem into your Mango’s WAN port. Then fill up the necessary information, and with this, you’ll get connected to the internet. You’ll get the indication for a successful outcome via a green dot that pops up next to the Ethernet option on the admin panel.
✓ Repeater: Using a repeater means connecting your GL iNet GL MT300N V2 setup to an already existing wireless network. So, for this tap on the Internet option. Select Repeater. Then choose the network identity. Input its password. Finally, click on Apply. Once connected, an indication (green dot) pops up in front of the network name.
✓ Tethering: For this connection method, you require a smartphone alongside a USB cable. So, using this cable, link your modem to the cellphone. In addition to it, activate the personal hotspot on your device. Now, from the main screen, after you tap on the Internet option, select the Tethering option. Thereafter, tap on Connect. Again, when the outcome is in your favor, a green dot pops up in front of the Tethering option.
✓ Cellular: The last option is a cellular connection. For this, just connect your 3G/4G modem to the USB 2.0 port of the router. Tap on the Internet option from the panel. Select cellular. Choose the region and service provider, and other details fill up automatically, and then tap on Connect. With this, the setup completes.


