Roof Vent Installation Guide for Homeowners
Proper roof ventilation is one of the most crucial aspects of maintaining a healthy home. A well-ventilated roof helps regulate indoor temperatures, reduces energy costs, and extends the life of your roofing materials. In this roof vent installation guide, we’ll cover everything you need to know about roof vents, from choosing the right type to completing the installation. We’ll also explain why conducting a roof inspection before installation is essential for long-lasting results.
Why Roof Ventilation Matters
Roof vents play a significant role in your home’s overall efficiency and durability. Here are the primary benefits:
- Moisture Control: Prevents condensation buildup in the attic, which can lead to mold and rot.
- Temperature Regulation: Keeps your attic cooler in summer and reduces ice dam formation in winter.
- Energy Savings: Less strain on your HVAC system means lower energy bills.
- Roof Longevity: Proper airflow prevents shingles from curling or deteriorating prematurely.
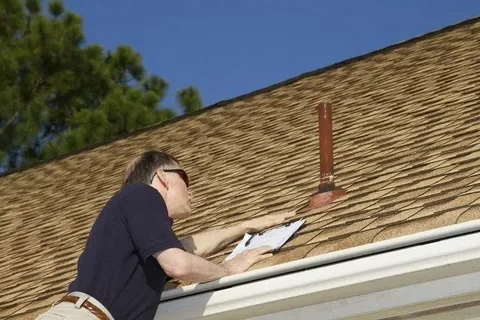
Before you begin any installation, a roof inspection will help identify weak spots, leaks, or existing ventilation problems that need to be addressed first.
Step 1: Conduct a Roof Inspection
Before installing new vents, a thorough roof inspection is critical. Here’s what to check:
- Shingle Condition: Ensure there are no damaged or missing shingles where vents will be installed.
- Roof Decking: Check for any signs of water damage or soft spots.
- Existing Vents: Identify if current vents are functioning properly or need replacement.
If any issues are found, address repairs first to ensure your new roof vents perform optimally.
Step 2: Choose the Right Type of Roof Vent
There are several types of roof vents, each serving different purposes:
- Ridge Vents: Installed along the roof’s peak for continuous airflow.
- Box Vents: Also called static vents, ideal for smaller attic spaces.
- Turbine Vents: Use wind power to pull hot air out of the attic.
- Powered Vents: Electric or solar-powered fans for maximum ventilation.
Consider the size of your attic, local climate, and roof style when choosing a vent type.
Step 3: Gather Tools and Materials
For a smooth installation, prepare the following tools and materials:
- Roof vents of your choice
- Roofing nails and sealant
- Circular saw or jigsaw for cutting openings
- Measuring tape and chalk line
- Ladder and safety harness
Step 4: Mark and Cut the Vent Openings
- Measure & Mark: Use a chalk line to mark the exact position for your vents, ensuring proper spacing for airflow.
- Cut the Opening: Carefully cut the vent opening with a jigsaw or circular saw.
- Check for Obstructions: Make sure no rafters or wiring obstruct the vent location.
Safety is paramount—always use a stable ladder and harness while working on the roof.
Step 5: Install the Roof Vents
- Position the Vent: Place the vent into the opening and ensure it fits snugly.
- Secure the Vent: Nail the vent into place according to the manufacturer’s instructions.
- Seal the Edges: Use roofing sealant to waterproof the edges and prevent leaks.
- Reinstall Shingles: If necessary, trim and reposition shingles around the vent for a seamless finish.
Step 6: Perform a Final Roof Inspection
After installation, a final roof inspection ensures everything is properly sealed and secure. Check for:
- Proper placement and attachment of vents
- No gaps or leaks around the edges
- Clean and unobstructed attic ventilation
Maintenance Tips for Roof Vents
To keep your roof vents functioning properly:
- Inspect vents every 6-12 months for damage or blockages
- Clean away leaves, debris, and nests that may obstruct airflow
- Schedule a professional roof inspection annually to maintain overall roof health
Final Thoughts
Following this roof vent installation guide ensures your home remains well-ventilated, energy-efficient, and protected from moisture damage. Pairing installation with a professional roof inspection will help identify any hidden issues, extending the lifespan of both your vents and your roof. Investing time in proper installation today will save you costly repairs and improve your home’s comfort for years to come.


